


How to Properly Apply Nail Polish: A Step-by-Step Guide

Applying nail paint may appear simple, but doing it correctly results in a salon-quality finish that lasts longer. In this blog, we’ll show you how to properly apply nail polish at home. Let’s get started.
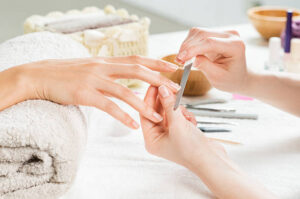
Step 1: Prepare Your Nails
Before you start painting, it’s important to prepare your nails properly. This ensures that the polish sticks properly and lasts longer.
1. Remove Old Polish:
Remove any leftover polish or oils from your nails using a nail polish remover. Acetone-based removers are ideal for tenacious polish.
2. Trim and File Your Nails:
Shape your nails with a nail clipper and file them to your preferred style (round, square, or almond). Smooth out rough edges using a fine-grit file.
3. Push Back Cuticles:
Using a cuticle pusher, carefully push back your cuticles to create a clean base. Avoid cutting them to avoid infection.
4. Buff the Nail Surface:
Lightly buff your nails with a nail buffer to create a smooth surface. This makes the polish adhere better.
5. Wash Your Hands:
Using soap and water, clean your nails to eliminate dust and oils. Dry thoroughly.
Step 2: Apply the Base Coat
A base coat is essential for protecting your nails and creating a smooth surface for the polish.
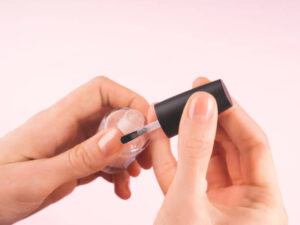
1.Use Right Base Coat:
Use a clear base coat or one designed for specific needs (e.g., strengthening or ridge-filling).
2. Apply a Thin Layer:
Begin at the center of your nail and brush the base coat outward toward the edges. Ensure that the coat is even and thin.
3. Let It Dry Completely:
Allow 1-2 minutes before proceeding to the next step.
Step 3: Apply Nail Polish
Here comes the exciting part! Follow these steps to achieve a smooth, even finish:
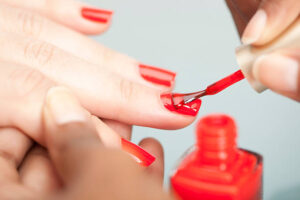
1.Shake the Bottle:
Roll the nail polish bottle between your hands for a few seconds to mix the solution and prevent air bubbles.
2. Load the Brush Properly:
Dip the brush into the polish and remove any extra substance from the bottle’s rim. You want just enough polish to cover the nail without causing streaks.
3. Start Painting:
Start in the center of your nail, near the cuticle, and sweep the brush towards the tip. Paint one side of the nail first, then the other to cover the entire surface.
4. Apply a Second Coat:
Once the first coat is dry (about 2 minutes), apply a second thin coat for full coverage.
5. Clean-Up Mistakes:
Use a little brush dipped in nail polish remover to remove any smudges from the edges.
Step 4: Finish with a Topcoat
A top coat is the key to a polished, long-lasting manicure.
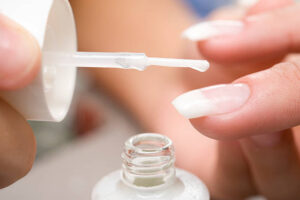
1. Use a High-quality Top Coat:
Depending on your preferences, choose between a glossy and a matte finish.
2. Apply Evenly:
Brush at the center outward, much like with the base coat. Make sure to cover the nail’s edges to seal the polish.
3. Let It Dry:
Allow your nails to dry completely to avoid smudges.
Step 5: Quick Drying Tip
These tips can help you speed up the drying process.
1. Cold Water Dip:
Soak your nails in cold water for a few minutes to set the polish.
2. Use a Fast-Drying Top Coat:
Invest in a top coat designed to dry quickly.
3. Avoid Heat:
Allow your nails to air dry; using heat may cause bubbling.
Step 6: Maintain Your Manicure
To keep your nails looking fresh, use these maintenance tips:
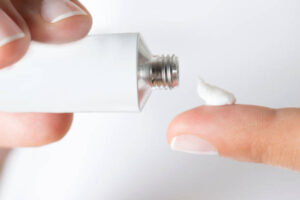
1. Moisturize Daily:
To avoid dryness and cracking, apply hand lotion or cuticle oil.
2. Avoid Harsh Chemicals:
Use gloves when cleaning or washing dishes to protect your nails.
3. Touch Up:
If your polish chips, use a small quantity of polish and reapply the top coat.
Conclusion
With three simple techniques, you can create a professional-looking manicure at home. Remember, the trick is to prepare and apply thin, even layers. Practice makes perfect, so don’t be shy to try new colors and techniques. Happy polishing!